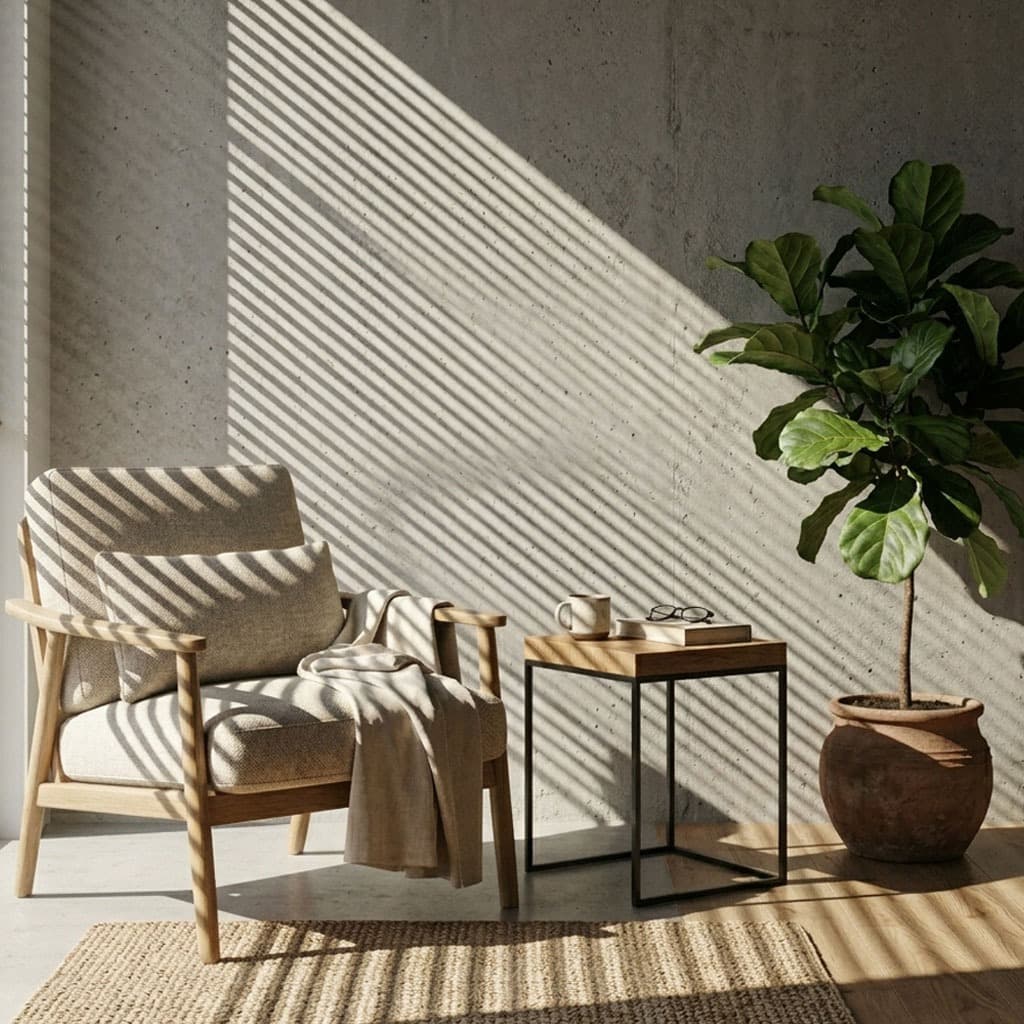
Learning how to use gobos in Blender is one of the fastest ways to elevate your renders from amateur to cinematic. Whether you want to cast realistic window shadows across a character or simulate dappled sunlight filtering through a forest canopy, projecting textures from your lights is the industry-standard technique.
Step 1: Setting up Your Light Source
In Blender, gobos work best with Spot Lights or Area Lights. Directional lights (like the Sun lamp) do not support texture nodes in the same way, so we will use a Spot Light for this tutorial.
- Press
Shift + Aand add a Light > Spot to your scene. - Position the light so it points at your subject.
- In the Light Properties panel, increase the Power (e.g., 5000 W) so it's bright enough to see clearly.
Step 2: The Node Editor Setup
To apply a gobo texture, we need to use Blender's Shader Editor for the light source.
- Select your Spot Light and click the Use Nodes button in the Light Properties panel.
- Split your viewport and open the Shader Editor.
- Press
Shift + A, search for an Image Texture node, and drop it into the graph. - Connect the Color output of the Image Texture node to the Color input of the Emission node.
- Click Open on the Image Texture node and load a high-resolution gobo texture from GoboVault.
Step 3: Cycles vs. Eevee Workflows
Blender features two primary render engines, and gobos function slightly differently in each.
Using Gobos in Cycles
Cycles is a path tracer. It calculates light to achieve cinematic scenarios. Once your node is plugged in, the gobo will work immediately in Rendered view. Cycles allows you to create accurate, soft shadows by simply increasing the Radius of your Spot Light. A larger radius creates a softer, more diffused shadow edge.
Using Gobos in Eevee
Eevee is a real-time rasterization engine. While it supports node-based lights, you may need to adjust your shadow settings to get clean results. Ensure Soft Shadows are enabled in your Render Properties, and increase your Shadow Map resolution if the gobo pattern looks pixelated or jagged.
To scale or rotate the gobo pattern within the light cone, add a Mapping node and a Texture Coordinate node (set to Normal) before your Image Texture node.
The Drag-and-Drop Workflow
Manually wiring nodes every time you want to test a new lighting setup can be tedious. This is why we created the GoboVault Blender Add-on. By installing the add-on, you can browse the entire GoboVault library directly inside Blender's Asset Browser and simply drag-and-drop gobos straight onto your lights with zero node setup required.
Ready to try it out? Download the GoboVault Free Tier to get 25 premium, production-grade gobos and elevate your Blender lighting today.